
Whether you are writing a blog post, a Facebook post, or a user manual, you will, on occasion, need to capture a screen shot to demonstrate your point. In this blog post, I will talk about the basic steps to capture a screen shot.
The first step is to determine what the right key(s) sequence is. These vary by type of device (yes, you can take screen shots on your phone!). Here’s a wonderful site that I found that lists all the different ways to capture a screen shot: https://www.take-a-screenshot.org/.
On a Windows device there are two ways to capture your screen: the Print Screen and the Snipping Tool. On a Mac, the Print Screen and Partial Print Screen involve the same number of keystrokes. (To find the Snipping Tool, go to the Accessories folder.)
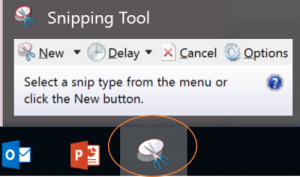
The Print Screen is marginally quicker to use on the front end, but in many cases the Snipping Tool will be more efficient than a Print Screen shot (it will be smaller and you won’t have to do any cropping.) This is a distinct advantage of the Snipping Tool. But there are times when you can’t use the Snipping Tool. For example, in the image below, I had to use the Print Screen method because the Snipping Tool icon disappeared when I activated the tool. As always, it is good to be comfortable with several tools.
At this size, there is no discernible difference, but it is good to know the difference. In my own experience, I have not had a problem with image resolution, simply because I am intending my images to be viewed on screen, at the same size as I captured them.
On Monday, I will talk about why I use PowerPoint as my image editor, rather than Photoshop or MS Paint. Have a great week-end and keep soaring!